
Metal Projects.
- Jan 26, 2017
- 3 min read
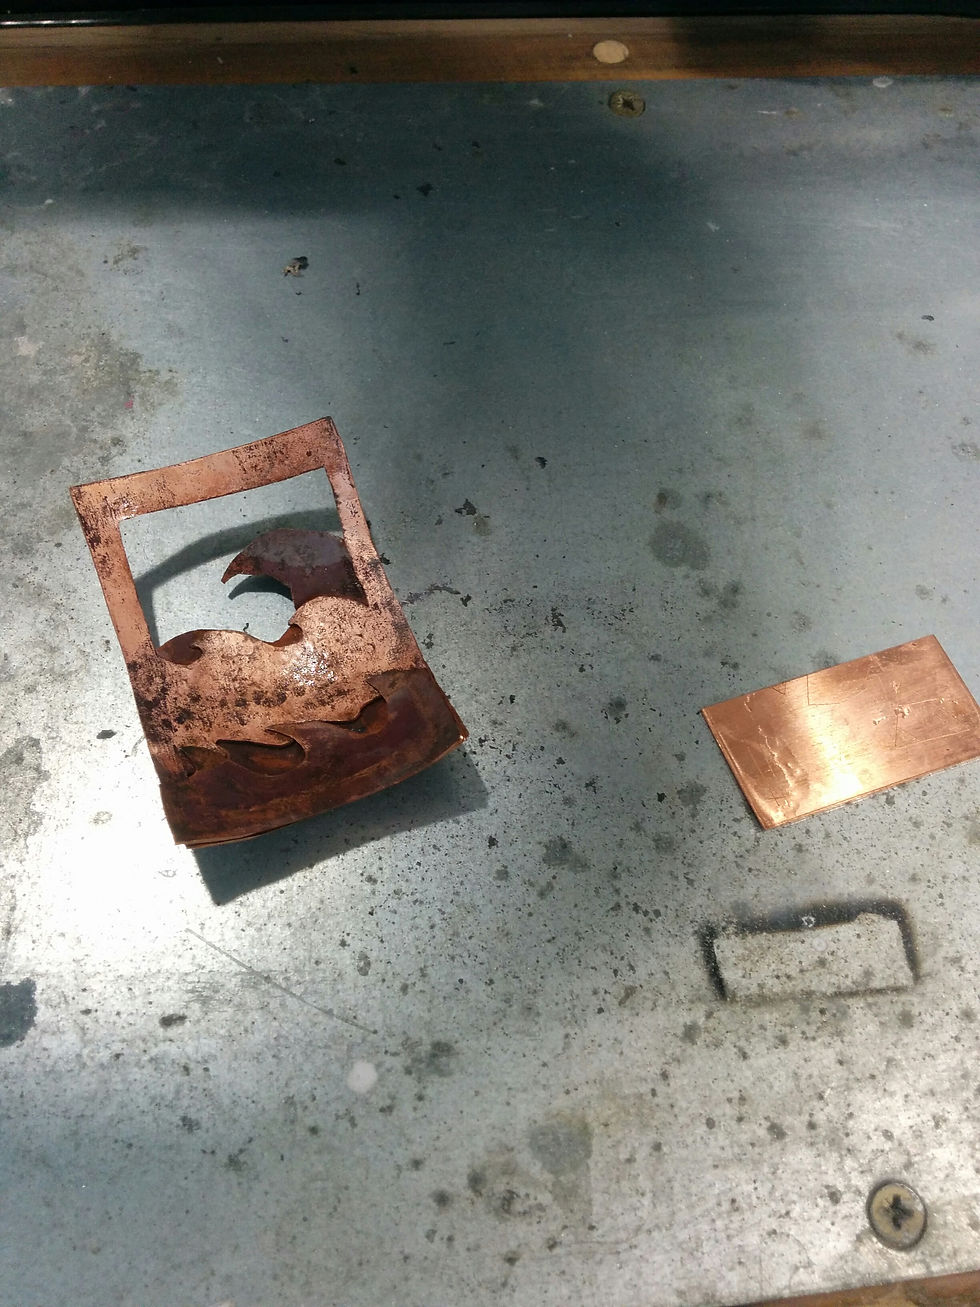


For this metalworking I wanted to use the folding technique shown by Maria as well as use my design from the realisation brief. I used two pieces of copper and glued tracing paper onto them then drew my design onto the paper making sure the the two parts lined up to be folded into the pattern. I chose this method because I wanted to give the illusion of depth and felt that this was the best way to achieve this goal. after folding was complete I was happy with the result and began to filed back edges and clean it up more. I then decided that I would try and silver solder it onto another piece of copper so that it would be free standing but during the process I overheated the copper and the already strained fold reached its breaking point and broke before I could solder it onto the bottom.


At the time I was unable to think of anything I wanted to make with the use of rivets and plan to revisit or use them at another time. I also found I struggled with silver soldering and had issues with getting the solder spread evenly across the metal. My first attempt was successful but very messy and wasteful. My second was unsuccessful on parts but still somewhat stayed on I think this was because I had not used enough solder for the third attempt were I used some more was the best attempt it was the cleanest and covered the entire length of the metal holding it in place.


When doing press forming I used designs from the visualisation unit. I transferred my design onto a piece of perspex and cut out the shape. I then used the press for push my design into the metal. I experimented with different strengths starting with 5 tons and steadily going up until I reached 12 tons which is were I began to hear cracking in my perspex so I set that as my limit. I found that when moving up from 5 tons to 8 there were drastic differences in how much the metal popped out but once you began to go higher the differences were so minimal that it was not worth risking the metal splitting for such minor results


My first attempt at this was with brass. I had a simple design and did no want to do anything too fancy with it I just wanted to practice the technique. I found that with the brass piece the different hammer strikes gave a nice contrast and with the use of the raising hammer I found that it give it a texture that looked almost like a leaf. Much later I decided to revisit this but this time rather than using brass I decided to use a more difficult material and use steel. I flattened out the steel and roughly shaped it into a leaf then folded it. All of this had to be done red hot for I could not work it cold without having the metal split. I found that heating with a blow torch became very difficult for it was hard to controls the heat on such a small piece of metal and not melt it. after getting the shape I wanted I added the finishing touches with the hammer. Once this was all done Noah showed me how to use the buffing wheel and with the the wire bush I cleaned up the product. I liked the wire brush for it left all the little details left from the forging process while still cleaning up the metal.


I had also attempted to make a pattern welded billet. I started this using all the same type of steel for it was a trial run in order to see if it was possible to do with a blow torch. I beg
an by wrapping the steel into one long spiral. I actually like the look of the pre-forge weld and may use it in the chair project possibly for a chair leg of maybe some other kind of build. Once it came to attempting the forge welding it was not very successful. I was not able to get the metal ho enough evenly enough and it meant I was getting superficial welds all over the surface and none was unable to make the metal form one clean billet even after I attempted to fold it.

I had also attempted some small scale brazing on a ring that I had made by forging a pieces of metal around a pipe. I then decided to connect It together using braze. This was successfull minus a little bit of difficulty getting it to fill the gap properly. The finished product I was not too keen on. I felt that it was missing something and wish to experiment further with different techniques and different materials.


Comments