
2nd Glass rotation
- Apr 24, 2017
- 4 min read
part 1
We were given the task of taking two random objects to be used as shape to be placed in a mould. I chose to bring a piece of crystal and a bridge from one of my old guitars. Sadly I was unable to use the bridge due to its shape being too strange which would make it impossible to cast so I ended up using my crystal and a metal finger cot that was given to me for the mould making. My crystal mould came out quite well with it taking most of the shape really well and keeping most of the detail. On the other hand the finger cot mould did not go as well. The mould itself worked perfectly fine and held the detail it was just I did not use enough plaster. This made it extremely fragile and it ended up breaking extremely early in the development process.
part 2

Once we had all made our moulds we pooled them and made a bunch of wax models using the moulds. my moulds held out quite well and provided quite a few high quality models but as said before the finger cot was pretty much unusable after the first couple of uses were as the crystal mould held out well. once our moulds had been made and were hardening we also experimented with Jesmonite making small models experimenting with colour and the two tone effects you could achieve with Jesmonite. I actually quite liked the Jesmonite and felt that I could maybe use it in some future jewellery projects.
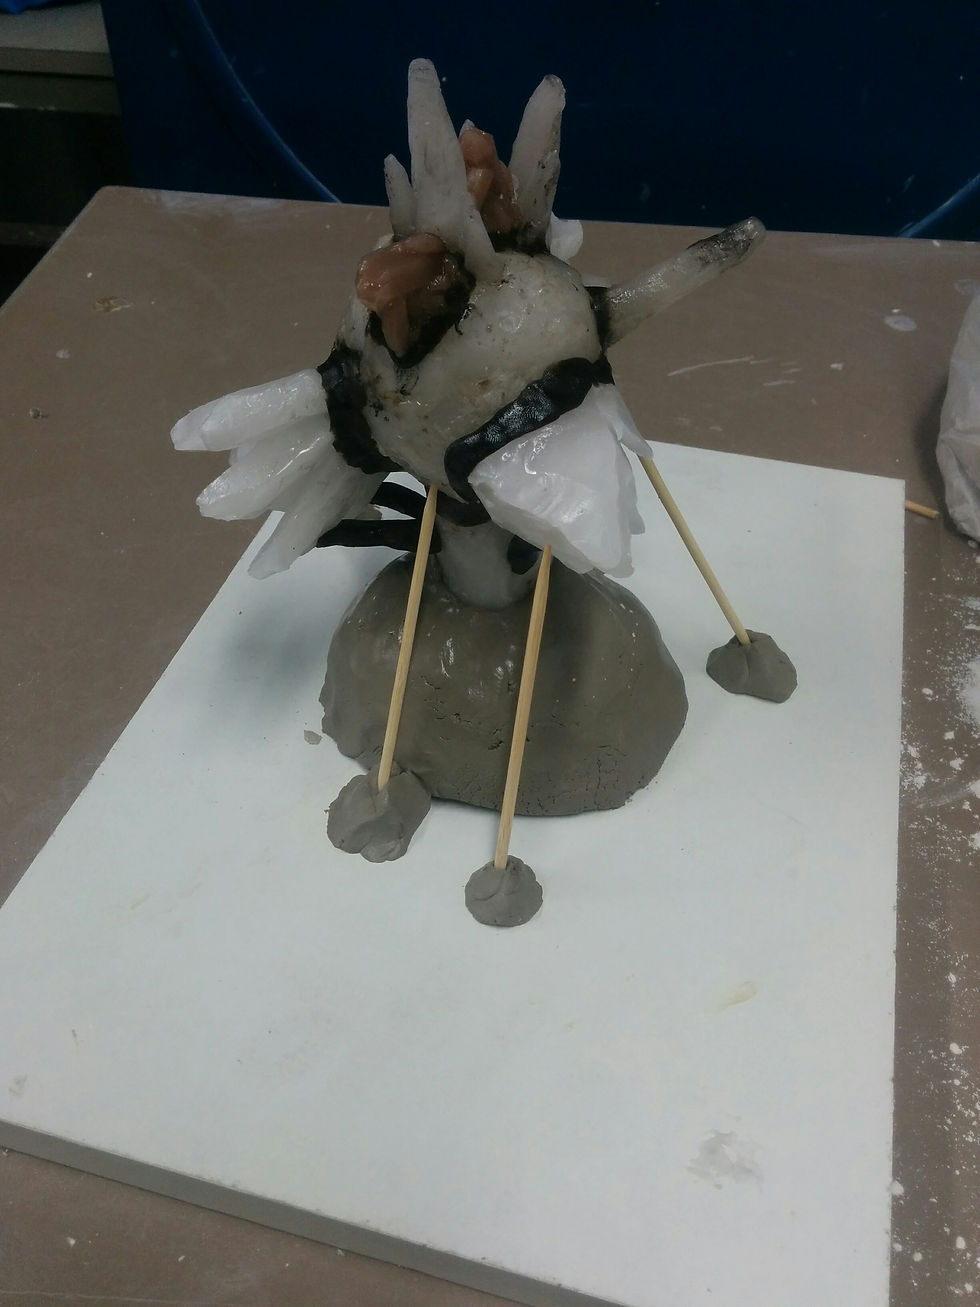
part 3
Once all of the wax moulds had been made were were told to combine all of the models in order to create the essence of our creature. I found this difficult for I have always found it hard to make sculptural pieces. I ended up using a mixture of wax models from the classes moulds with my crystals being the main mould I used for it was the most prominent feature of my creature. I found that when making I was struggling with looking deeper into the design of my creature and did not really enjoy making the essence for it was a bit too far out of my comfort zone. I also hand made a few of the shapes found on my model for there was not much that I felt i could use with the design of my creature.
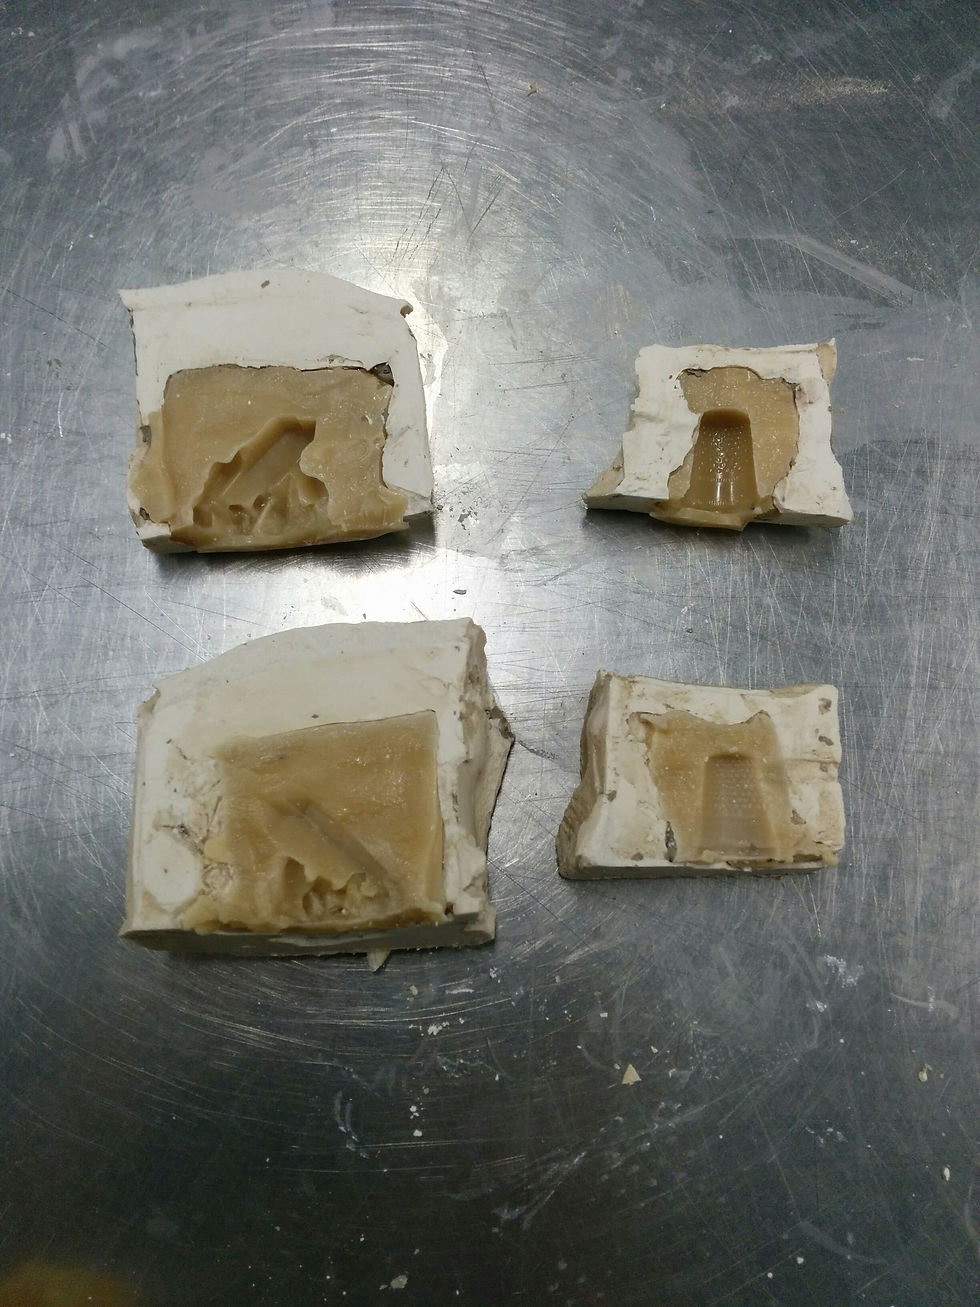
part 4
After finishing my wax model we then began to create our plaster cast of the sculpture. This was done by poring plaster onto the model we had made making sure there was enough space to store the extra glass for when it is cast the glass would slump into the mould and would not fill it if there was not enough extra space to store the space glass. I found making the models somewhat tricky for I struggled to understand the direction we were aiming for with the plaster model but when It clicked and I understood it was just a matter of chucking it on and filling in the gaps I was fine. Once our plaster casts were all dried and solid we used the steamer in order to melt the wax out. This ended up taking a while due to the sheer number of models and it ended up taking longer than I had planned which somewhat messed up my time plan but It was fine. once the wax had been melted out I rinsed the mould to make sure any extra was was gone and then left it to dry.
part 5

When it came to casting the glass we needed to check how much glass was needed in order to fill the mould. This was done by filling the mould with water and measuring how much water was put in and then later translating that into the weight of the glass that was needed. This was fairly simple maths and I did not find this difficult but one thing I did find was due to the nature of my mould there were a few small holes that meant as I measured the water leaked out making my measurements not quite as accurate as I would have liked.
Part 6

Once the glass was cast in the mould we had to chip away at the mould being careful not to damage the glass and doing it under an induction fan in order to avoid breathing in the plaster.my mould came out well and did not break while taking it out which I was happy with but as I had expected due to the the holes my measurements were a bit off and there was some excess glass but I simple had to file it off which was just a small bit of extra labour. I chose not to give a high polish for as we were cleaning the moulds we were given the task of expanding the glass and I was pretty set on using metal so I did not want to polish my glass only to scratch it again so I simply got any excess plaster out of any little holes and left the sculpture like that.
Part 7
For the expansion of our model our methods were left entirely up to us but seeing as I hadn't been able to do any large metal work in a while and I wanted to practice my welding I decided to make my expansion based on the urban environment I had discussed in my sketchbook using metal rebar and rubble I had made. I feel that the end product came out really well and it all works as intended only thing I would have changed is the colour of the glass for I feel that the blue glass does not go well with the steel colour and feel that I should have gone with the dark and clear glass.

Evaluation
All in all I found this part enjoyable but at the same time stressful for I felt a lot of the processes were not explained extremely well and I was not given enough time to plan before lessons for I was only told about the essence thing a few days before I needed it done which did make things feel a bit rushed for me when it came to making. Same goes for the expansion portion I was caught fairly off guard by it and felt I had to sort of force/tack it onto the end of something I had designed to be free standing.


Comments